Friday, February 28, 2014

How I make my Swiss meringue buttercream

When it comes to cakes, two of my most frequently asked questions are: 1) what kind of frosting I use; and 2) how I get to spread the frosting so smoothly.

My choice of frosting for cakes that require decorations is Swiss meringue buttercream.   The reason I like this type of frosting is because it is very light and fluffy and it is not too sweet.  I use it to frost and fill cakes, pipe borders, flowers, letters, etc.

For me, in order to get a smooth finish on a cake, the first requirement is to make the frosting at the right consistency for spreading.  I bet there are tons of recipes and tutorials on the internet on how to make Swiss meringue buttercream but here, I will be showing you how I do it and what my secret is.

Take note: The recipe was originally posted here

SWISS MERINGUE BUTTERCREAM (makes enough to frost and fill an 8" round cake)

1. In a clean, heatproof bowl, combine 3 eggwhites and 3/4 cup sugar. Set the bowl over (but not touching) simmering water in a saucepan and heat the mixture, whisking constantly, until the sugar has completely dissolved and the mixture is very warm to the touch.


*I neither time this step nor take the temperature of the eggwhites.  When the mixture feels smooth when rubbed between my fingertips (meaning, the sugar has dissolved), then I know that it's ready to be taken off the heat.  

2.  Using an electric mixer, starting on a low speed gradually increasing to high, beat the eggwhite mixture until it is fluffy, cooled to room temperature, and holds stiff peaks.


*Again, I do not find timing this process necessary.  I just watch the eggwhites to make sure they do not get overbeaten and become dry.

3.  Now here's the secret.  Most recipes will tell you to use room temperature butter.  What is room temperature anyway?  In the summer, it is hot.  In the winter, it's cold.  Butter can be at room temperature and yet be really stiff.

You need to use 1 cup unsalted butter that is VERY soft.  Not melted, but soft.  Soft enough that you can cream it with a spoon and it will look like mayonnaise.


Don't be afraid to soften your butter in the microwave if you need to.   I do it all the time.  Just don't let it melt! 

With mixer on medium-low speed, drop the butter by the spoonful into the meringue.  Scrape the sides of the bowl once in a while to make sure all the butter is beaten in.


When all the butter has been incorporated, add a pinch of salt plus 1 teaspoon vanilla extract.  

4.  Beat on high speed until buttercream is light and fluffy. (Most recipes will warn you that your mixture might go through a soupy or curdled stage before becoming fluffy.  When this happens, you need to just continue beating and the mixture will eventually come together. In my experience, with the use of very soft butter, my frosting goes fluffy as soon as all the butter is in!)


Before using on a cake, either beat with a paddle attachment or simply mix with a spatula to knock out excess air in the frosting.

I used this kind of frosting for the 2 baptism cakes I showed in my previous post.  Here are a few others I've recently made, just to show you that it isn't really all that complicated to get your cakes to look neat!


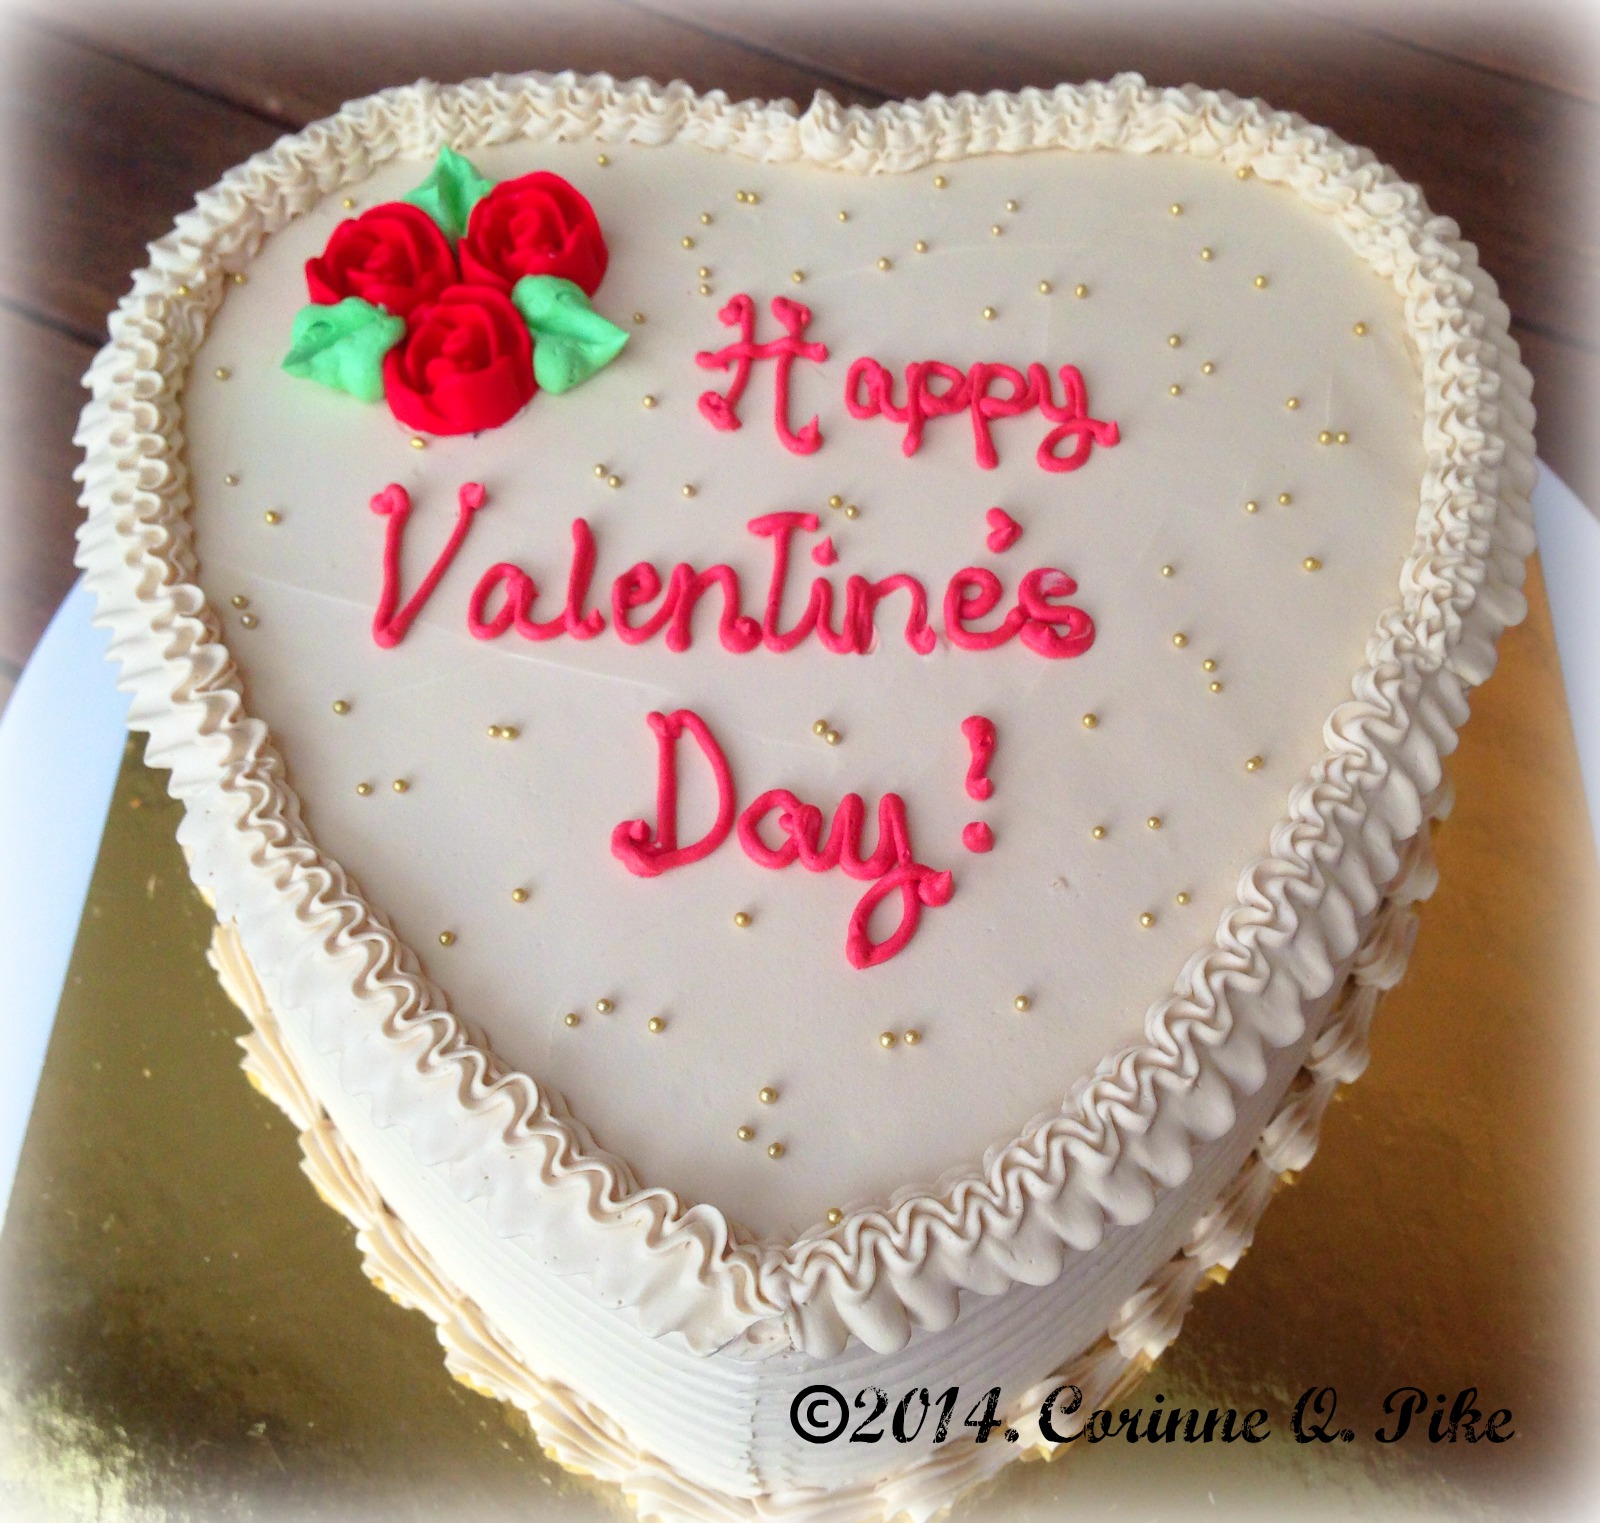
Just today, I also used this frosting to pipe roses and borders on this simple caramel cake.


Hope this post helps everyone wanting to try or have been having difficulty making Swiss meringue buttercream!  Next time, I will show you some of my favourite tools to use when frosting with buttercream.

Till then, have a good weekend!

Thursday, February 20, 2014

Heavenly Lemon Squares


LEMON SQUARES....to me this is the ultimate comfort food.  I don't know why but I get that happy feeling every time I eat it.  I know my whole family feels the same way cause when I bake it, all 32 cut pieces are gone in a few hours.


For many years, I didn't know how to replicate my aunties' lemon squares.  Their version wasn't gooey, or custardy, or chewy.  It was light and cakey.  And it was the only way I liked it.

I got hold of the recipe just last year.  The problem with most of my aunties' handwritten recipes though was that instructions were always lacking.  Mostly, they were just  listings of ingredients with very general procedures.  Some don't even have baking temperatures and baking times!  Someone with no baking experience would certainly not be able to understand them.   Luckily, I know a thing or two about baking and could somehow fill in the blanks and figure out whatever is missing or seems doubtful.

One thing I figured was that in order to make the filling cakey, then I had to make it like I would a cake.  Makes sense right?  So instead of just mixing the ingredients all together (as other recipes suggest), I tried beating the eggs very well in order to aerate them, much like a sponge cake. The result?


A super light and soft layer of cake!  With this particular recipe, the lemon taste is quite subtle and not overpowering.  My youngest, who is not at all a fan of anything citrusy, absolutely devours these! And the crust? It's heavenly as well!  It has a delicate crunch to it and literally melts in the mouth. Being so light, the only reason we stop ourselves from eating so many is pure guilt....

Have I made you crave for lemon squares yet?  Why not give it a try?  I'm pretty sure you'll be hooked as well!

LEMON SQUARES (makes about 32 pieces)


Ingredients:

For the pastry:
1 cup salted butter, cut into cubes
½ cup powdered/icing sugar
2 cups plain flour

For the filling:
½ cup plus 2 tbsp plain flour
1 ¼ tsp baking powder
½ tsp Salt
5 large eggs
1 ½ cup plus 2 tbsp granulated white sugar
1/3 cup lemon juice (about 2 large lemons)
1 tsp lemon extract
zest of one lemon (optional, if you prefer it to be more tangy)

powdered/icing sugar for dusting

Procedure:

1.  Preheat oven to 180 deg C (350F). If you are using a fan-assisted oven, you might want to turn off the fan or lower the temperature to 160 deg C.  Line a 9x13 baking pan with baking paper. (I use a rectangular springform pan which makes it so easy to remove the lemon squares.)
2.  In a medium bowl, mix together all the ingredients for the pastry until it forms a dough. (You can use a mixer or a food processor to do this but I just use my fingers to squish it all together.)  Gather dough into a ball.
3.  Press the dough onto your baking pan. Spread it as evenly as possible. (Tip: If you have a 
fondant smoother, cover the surface of the dough with baking paper then flatten with the 
smoother.)
4.  Chill in the fridge for about 15 minutes then bake in the oven for 25 minutes.  After the pastry is baked, take it out but leave the oven on.
5.  While the pastry is baking, prepare your filling. (You can start this process about 10 minutes after your pastry has started baking. This is just so your mixture will not sit for long before it goes into the oven.)  In a small bowl, whisk together the flour, baking powder and salt.
6.  In a large mixing bowl, beat the eggs until foamy, starting from a low speed gradually increasing to high.
7.  Slowly add in the sugar.  Beat the mixture until it is very light yellow in colour and it has quadrupled in volume.
8.  With mixer on lowest speed, add in the lemon juice, lemon extract and zest, if using.  Lastly, add in the flour.  Mix only until everything is combined.
9.  Pour the filling on top of the warm, baked pastry.  Place pan back in the oven, lower the temperature to 160 deg C (325F) and bake for about 30-40 minutes or until the top springs back when lightly touched.  Again, if you are using a fan-assisted oven, lower the temperature to 140 deg C. Baked filling should be very light golden brown.
10.  Move pan to a wire rack.  Let cool completely before slicing into squares.  Dust top generously with icing sugar.

Enjoy!


Tuesday, February 11, 2014

My life in the last 1 1/2 months

It seems to me that nowadays,  I always have to start my blog post by apologizing for being away for a long time.  I don't want to do that all the time but guess what?  I just did again!  I wish I had exerted more effort in telling you about the interesting things I have done in the last couple of months...not when I've nearly forgotten about them but when they were still very fresh in my memory.

The school holidays ended just over a week ago and two of my kids are back in school and the two older ones still waiting for theirs to start.  Now that I think about it, no matter how really long it was in reality, the holidays still felt like they just came and went.  My only brother with me here in Australia left for the US in early December with his family while a lot of our friends also spent Christmas elsewhere.  Poor us!  We felt so alone in what's supposed to be the most joyous time of the year.  We invited a Filipino family over for dinner shortly after the 25th to have some company.  It gave me the chance to make some cathedral windows, something I haven't made in such a long, long while.  Now I remember why I love this dessert so much.

It's so beautiful, isn't it?


Not to be entirely left behind, my family did have a short getaway at Phillip Island after New Year.  For those who do not know, Phillip Island is a famous destination here in Victoria.  It is south of Melbourne, about 2 hours drive from our home. 

This is where I was on my birthday!

We spent 3 days and nights there.  The best part of the trip for me was witnessing the penguin parade.  What amazing creatures those penguins are! Too bad, photography wasn't allowed.  Apart from watching the penguins, seeing a kangaroo actually crossing the road was an experience in itself!

Also in January, my eldest son Francis turned 20.  Yes, 20! I could hardly believe it myself.  Last year, at about that time, we had just arrived in the Philippines from Singapore.  We celebrated his 19th birthday with a cake from Estrel's, remember?.  This year, I thought of replicating that cake in a smaller size.


The lengthy holidays also gave me the opportunity to sew.  Yes, you read that right.  I sewed.  With the summer weather becoming extremely hot (especially during the Australian Open), I quickly whipped up three pairs of shorts for me.  I also drafted a pattern for Envirosax-inspired bags and made two.  I used an actual Envirosax bag to make my pattern so they are exactly the same size, shape and make as the original one.  Yey for more shopping bags!

The blue one is made of ripstop nylon while the printed one is actually from an unused shower curtain!
I've been contemplating on making instructions for this but since the pattern is huge, I still have think about how I am going to cut it up to make it printable.  Stay tuned for that (no promises though!).

Let me see...hmmm, what else?  Oh, I also tried baking something new.  I made coffee buns for one. They're delicious but I think I would rather buy them than go through all the hassle of making them myself.  Too many steps!


Another thing I learned to make in recent times was the San Nicolas cookie,  a popular and traditional cookie from the province of Pampanga (where my father is from) in the Philippines.  A friend had sent me a wooden mould and just a day after I received it, I gave it a go.


The cookies looked stunning, with the imprint of the Virgin Mary carrying the baby Jesus, very evident.   However, they didn't appeal to my children that much, with my youngest commenting that it was too plain-tasting.  Couldn't contend with that because it was actually true.

My experience in making the San Nicolas cookie led to me to search for cookie moulds on the internet. This brought me to a most beautiful discovery - the springerle cookie.  The cookie moulds are just to die for!  I wasted no time and ordered a couple (and was sent a free tiny mould too!). Took me a while to try making the cookies but finally found time last week.  I will make the chocolate variation next!

Here are the uncooked cookies being air-dried before baking.  Just look at those details.
Aren't those just the most amazing looking cookies?

How about cronuts (or zonuts, as Adriano Zumbo calls them here)?  Taste Magazine featured Mr. Zumbo's recipe for his zonuts in its maiden issue in September. A little daunting but it wasn't something I was afraid to try.  Sadly, my attempt on making them proved to be a disaster. 


Everything went well in the beginning but I soon found out that making a butter-rich dough was a big no-no in very hot weather!  As the cut cronuts were sitting to rise before frying, the butter within the layers of dough started melting.  I wonder if I should have just let them rise slowly in the fridge?  Because the butter melted, the layers of dough separated upon frying.  I only got a few pieces done that actually resembled cronuts.  Seeing the amount of butter oozing out of each cronut actually turned me off from ever trying this again.

Speaking of Taste Magazine, I entered their Cook the Cover competition in November.  It was for ice cream sandwiches.


Unfortunately, I didn't win :(.  However, when I bought the January issue not long after, I found a really pleasant surprise!


The magazine printed my photo!  There were just 8 entries chosen, 2 of which were the winners.  I was quite elated and felt that I had somehow won too :).  Now I'm inspired to join again!  Maybe I'll even be luckier the second time around.

Last but not the least, let us not forget more cakes!  There were so many but my latest favourite are these two, quite identical, baptismal cakes, one for a baby girl and the other for a baby boy.


The gumpaste babies were made using a First Impressions mould.  I loved using it.  The babies were just so life-like!


Well, this is quite a long post now and hopefully, more than makes up for my away time. I hope that even if I didn't share a recipe or a tutorial here, the many things I shared will be enough to interest you in learning a new skill or in exploring something unfamiliar to you. 

That's about how my life has been in the last 1 1/2 months in a nutshell.  That, plus watching every single episode of The Big Bang Theory!  Till next.  Enjoy the rest of your week.