Wednesday, March 26, 2008

How to Make a Soft Sewing Bag

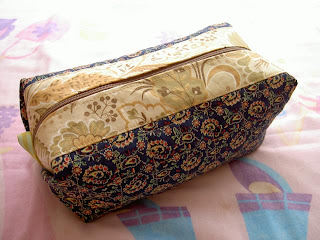
Interested in making this cute bag? Then read on....


Before we begin with the tutorial, let me just say that this bag is not an original idea of mine. This project is featured in a book called "A Passion for Patchwork" by Lise Bergene. While I have actually changed and/or added some steps, the basic procedure remains the same.

Materials needed:

one 12x12" outside fabric
one 12x12" inside fabric
two 12x12" batting
two 2x12" strips of the same fabric as inside (or different, if you prefer)
two 2x12" strips of stiff interfacing
one 16" zipper
two 1/2x3" ribbon
matching threads

* Note: If you plan to quilt your bag, cut your fabric pieces and batting slightly larger than the required size.

Procedure:

1. Sandwich the batting between the wrong sides of outside and inside fabrics. Pin pieces together heavily. If you do not wish to quilt, skip step 2.
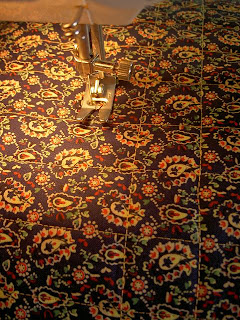

2. Quilt as you wish -- sew straight and/or diagonal seams or use free-motion quilting. After quilting, cut the piece to size, 12x12".
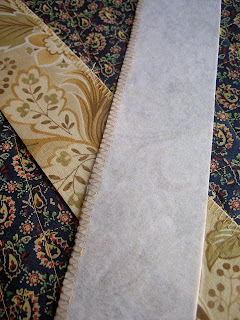

3. Iron interfacing onto the wrong side of the 2x12" pieces. Seal one side in zigzag stitch to prevent fraying.
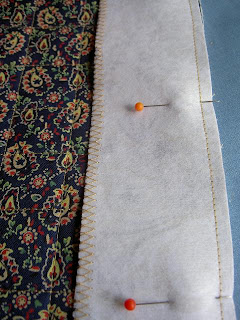

4. Sew the interfaced fabrics on both of the zip sides, with right sides together and using a 1/4" seam allowance.
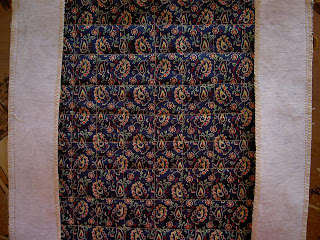

5. Zigzag stitch raw edges on the wrong side.
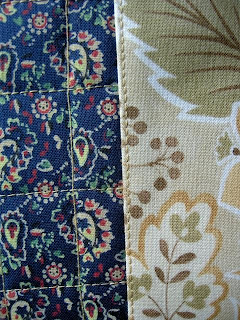


6. Press the edges over to the right side and sew a stitching line on the very edge of the fold.
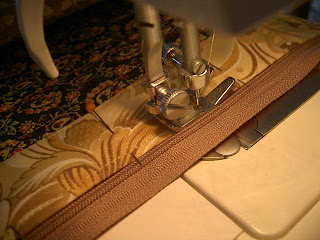


7. Fold in the other long edge of the strip to about 3/4" to prepare for zipper attachment. With right sides up, place your 16" zip along the folded edge. (Make sure the zipper is centered, with 2" extra hanging on both ends.) Stitch it down as close as possible to the zipper teeth. Open up the zip as you go along to make stitching easier.
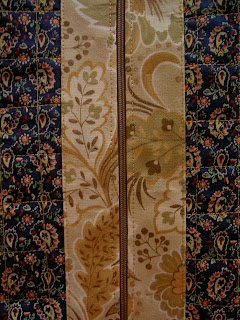

This is what you'll have so far....
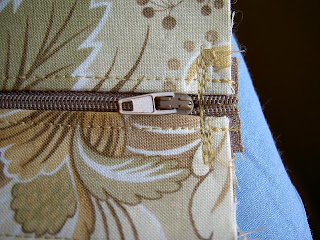

8. Sew a machine seam across the zip (near the short side of the bag). Cut off the zip ends. Open the zip halfway.
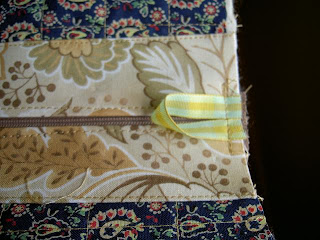

9. Take your ribbon and bring the ends side by side. Sew the edges to the zip ends on the right side of the bag, as in the photo above. Do the same with the other ribbon piece on the other side. Alternatively, you can use strips of fabric instead of ribbon. Cut two 2x3" strips. Press raw edges to the middle (lengthwise), then fold again towards the center. Sew down very close to the edge.
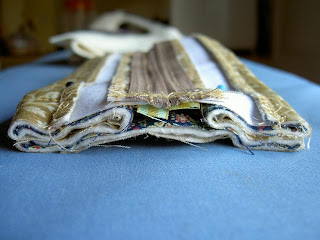
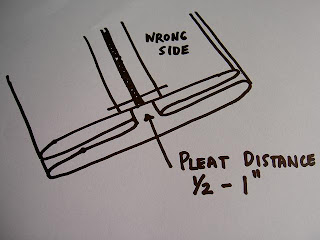
10. Turn bag inside out and and fold in 2 pleats of fabric towards the middle of the bag. Pin in place. See additional diagram above for clarity.
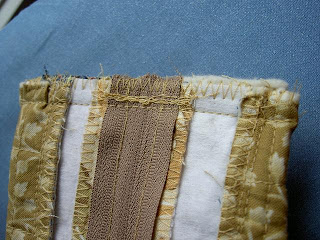

11. Sew 1/2" seams above the folds and seal the seams with zigzag stitch. If you are happy with the way your seams look, then you can skip the next steps and can turn your bag right side out now. If your edges turned out messy (like mine), you can cover them up with a strip or bias binding.
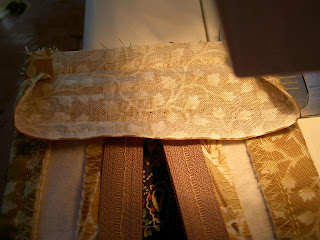

12. Cut two 2x5" strips of your inside fabric. Press raw edges towards the middle, then fold again to the center. Open the strips. Machine-stitch the binding in place along the crease.
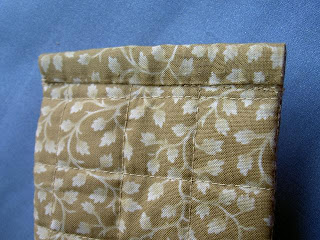

13. Fold the binding to the other side and slip-stitch in place. That's much neater, isn't it?
Turn bag to its right side, arrange the pleats to give the bag its proper shape.
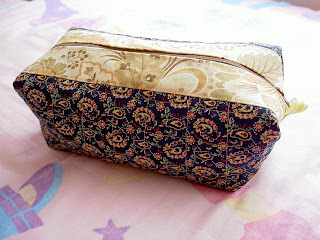


Congratulations! You are done. And here's the inside...
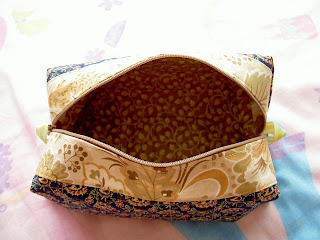

Finished bag is approximately 8 1/2" long, 4 1/2" wide and 4" deep. If you want to make a smaller bag, you can use: 8x8" inside/outside fabrics, 1 3/4x8" edges for the zip and a 10" long zip.

Hope the instructions were clear enough. I am happy to answer any questions. Happy sewing everyone!!!


Monday, March 17, 2008

25 Random Facts about Me

1. I belong to a family of 9 children. I am the youngest and only girl.
2. I am a Filipino-born Australian citizen.
3. I am a Roman Catholic.
4. I look younger than my age. Would probably even appear much younger if I dye my white hair!
5. I like Chinese food and pasta.
6. My real name is Mary and Heart in Spanish.
7. I quit the corporate world when my first son was born. That was 14 years ago.
8. I am a frustrated athlete. I wish I could do taekwondo.
9. I sell my handmade rosaries on eBay Australia.
10. The last movie I watched in the cinema was Juno.
11. I think Johnny Depp is way cool.
12. I dream of going to Jerusalem and Rome someday.
13. I am quite good at playing the piano, but I wish I learned how to play classical guitar as well.
14. I hate cleaning fish.
15. I have an Engineering degree.
16. I love Billy Joel's music. I have ALL of his recorded songs in my mp3 player. I watched his Melbourne concert in late 2006.
17. I fear the fact that my kids are growing up fast.
18. I am scared of snakes. Even just the thought of seeing one scares me.
19. My kids think I'm a great cook.
20. I've read all 7 Harry Potter books.
21. I can make the best Cathedral Windows dessert ever.
22. I am a homebody.
23. I had my first boyfriend at 17.
24. The life of St. Francis inspires me. My first-born was named after him.
25. I love my kids to death.


Thursday, March 13, 2008

My Fast-food Inspired Chinese Dish

Is it just me or do you too notice that a lot of fast food Chinese dishes have a common taste? Is it the oyster sauce or the sesame oil? Or perhaps the cooking wine? It seems that no matter what the meat is or what combination of vegetables there is in the dish, there is that basic sauce/ingredient that gives that same flavor. Don't get me wrong...I do like the taste. That is why whenever I want to come up with something 'Chinese-like' that has all the meat and veggies thrown in one dish, I use a basic mix of ingredients.

Ok, if you find the photo above appealing enough, then read on. That is what we had for dinner last night. I had some left-over cuts of beef and chicken in the fridge. I had to use them before they spoiled so I thought of this.

Beef and Chicken with Mixed Vegetables

Ingredients:
250 g lean beef, sliced thinly and into strips
250 g chicken breast, also sliced thinly and into strips
2 tbsps. cooking white wine
2 tbsps. corn flour
1/4 cup soy sauce (preferably Kikkoman)
1 tbsp. sugar
1/4 cup canola oil
1 large onion, sliced into rings
1/2 of a large red capsicum, sliced
250 g cauliflower florets
150 g sugar snap peas or snow peas
2 tsps. oyster sauce
a few drops of sesame oil

Procedure:
1. Marinate beef and chicken in wine and cornflour for about 30 minutes (or more if you have the extra time).
2. Combine sugar and soy sauce. Set aside.
3. Place cauliflower florets in a microwavable bowl with some water. Microwave on high for about 3 minutes. Drain water and set aside.
4. In a large pan or wok, heat oil until very hot. Drop the meat all at once. Cook, stirring constantly, for about 5 minutes or until meat is brown. Drain any excess oil.
5. Add soy sauce/sugar mixture, sliced onions, capsicums and sugar snap peas. Stir to combine well and cook for a further 2 to 3 minutes.
6. Mix in oyster sauce and sesame oil. Stir in cauliflower florets (coat with the sauce).
7. Serve immediately with rice (basmati is the best!). Enjoy!

Some additional notes:
* You can use 1/2 kilo of just one kind of meat (beef, chicken or pork).
* Try this recipe with other veggies such as broccoli, carrots, celery, zucchini, young corn, etc.
* I microwave the cauliflower only because I tend to overcook or undercook when I cook it in the pan. I do this with broccoli as well.


Tuesday, March 11, 2008

The Premier's 30-Minute Challenge

Last Saturday, our family registered for the Premier's Active Families Challenge. This challenge is an initiative of the Victorian government, in line with their 'Go For Life' campaign, which aims to improve the physical activity levels, health and wellbeing of families. To successfully complete the challenge, team members (such as our family) must complete at least 30 minutes of physical activity per day for 30 days. The program will run from the 9th of March up to the 20th of April.

On Sunday, the first day of the challenge, our family headed for the nearby basketball court. It was a very hot day (35 degrees), thus we had to wait until 5 o'clock in the afternoon before going out. I haven't played basketball in a long time, but it is THE one sport I am actually good at. I challenged my two older boys to a game of 21. In my younger days (modesty aside), I was actually unbeatable at this game and I am proud to say I still have the magic touch. I gave them a thrashing! Can't wait for our next game...

The next day, Monday, was a public holiday. My husband had planned for us to go to Queens Park in Moonee Ponds for a bit of breakfast picnic, jogging, walking, kick to kick, playground playing (does that sound right?). We left the house at 8am. I would have wanted to go earlier but then my kids liked to sleep in on a non-school day. We had real good fun.

The rest of the weekdays, we are doing our physical activities separately. My two boys had footy training this afternoon. My husband went on his usual gym workout. I parked my car outside the kids' school this morning, then walked 3.5 km to our home. I walked back to the school in the afternoon to get my car and my kids. That was more than an hour's worth of brisk walking!

With this Active Families Challenge, we do not only hope to get healthier. More importantly, it is a chance for our family to spend more quality time together.

If you'd like more information on this great program, go here.


Those are my kids feeding the ducks at Queens Park with old bread.


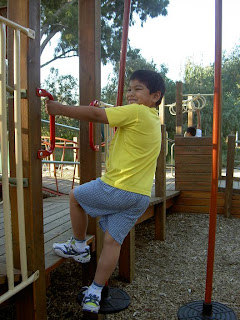
My little one trying to get fit in the playground.


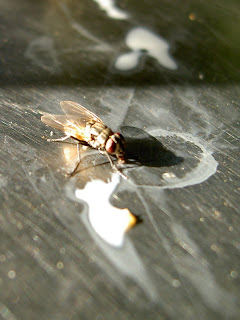
This fly was busy getting healthy as well, sucking up all the milk droppings on our picnic table. Did not even mind me taking its photo so up close!


Saturday, March 8, 2008

How to Make a Rosary Bracelet

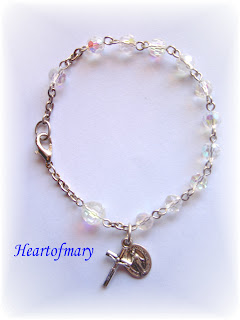
A rosary bracelet is a one decade rosary that can be worn around the wrist. The rosary bracelet in this tutorial is made up of 12 beads - one for the Our Father, ten for the Hail Marys and one for the Glory Be. It also has a crucifix and a religious medal. I prefer to use an 8mm bead for the Our Father and smaller beads for the rest, but this is not necessary. Also, the length of this bracelet is 7 1/2 inches. The size can easily be adjusted by shortening or lengthening the chain.

In an earlier blog, I provided a link to rosary-making instructions from the Rosary Shop. Since the procedure is basically the same, I am adapting most of the steps into this tutorial.

You will need:
1 - 8mm bead
11 - 6mm beads
12 eyepins
4 pre-cut chain links (two 3-link and two 5-link)
2 large jumprings
1 small jumpring
1 lobster claw clasp
round nose pliers
flat nose pliers
wire cutter


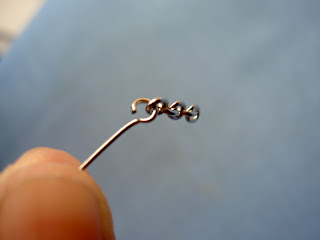
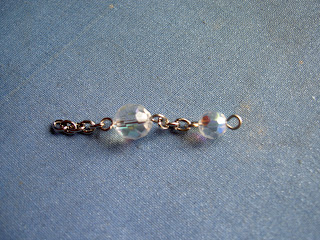
1. Take one eyepin and open the eye on one of the ends by twisting the free end of the wire sideways. Insert a 5-link chain into the open eye, then close the eyepin by twisting the free end back into its loop.

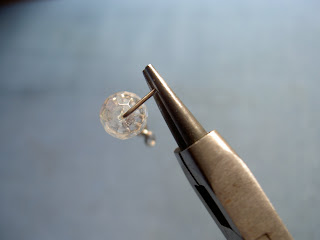
2. Place the 8mm bead on the eyepin. Bend the wire in such a way that it is perpendicular to the eye on the other side. Using a wire cutter, snip the wire so that about 3/8 of an inch of wire extends past the bead.


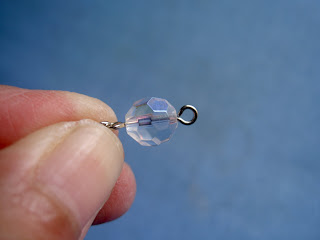
3. Move your round nose pliers down to the end of the wire. With a firm grip, rotate your wrist, rolling the wire toward the bead to make a nice loop. Leave a small gap in the loop (for the next step). This step is a little bit tricky and it requires some amount of practice to perfect your loops, so be patient.

That's a nice, round loop right there!

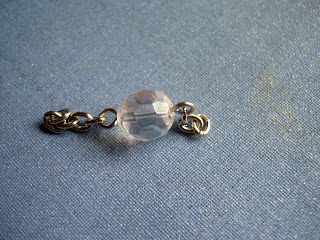
4. Insert a 3-link chain into the gap, then close the loop.


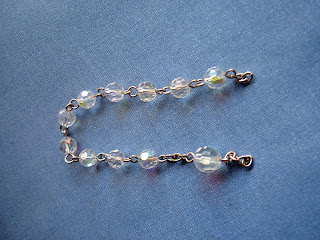
5. Take another eyepin and repeat step 1. Slip the other end of the 3-link chain into the open eye then close the loop. Using a 6mm bead this time, repeat steps 2 and 3. Place the eye of the next pin through the gap. String the next 9 beads to form the decade. On the last bead, leave the eye slightly open.


6. Slip the 2nd 3-link chain into the open eye, then close.


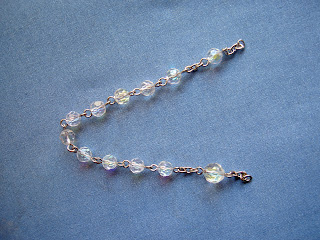
7. Open the last eyepin and hook into the chain. Close the loop. Place the last 6mm bead into the eyepin. Make the loop on the other side, in the same way as in the other eyepins. Put the last 5-link chain on the open loop before closing.


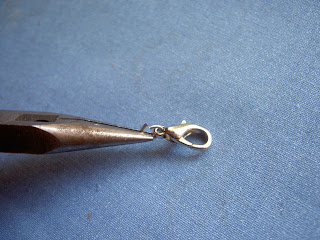
8. Get the small jumpring. Gripping it on either side of its opening with round nose and flat nose pliers, bend the metal sideways in opposite directions to open it. Insert the lobster claw clasp through the opening.

9. Attach the jumpring with the clasp to the 5-link chain (on the 8mm bead side). Get one large jumpring, open and attach it to the other end of the bracelet. Make sure the jumprings on both sides are securely closed.


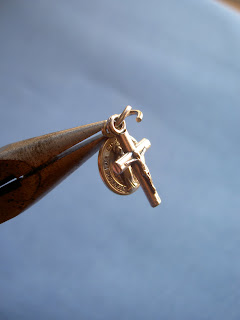
10. Take the last large jumpring, open and insert the medal and crucifix. Hook the jumpring through the chain between the 8mm bead and the first 6mm bead. Make sure the crucifix is on top of the medal. Close the jumpring.


11. That's it! You are done. The rosary bracelet is ready to be worn and used for prayer anytime you need it!

Hope the instructions were clear enough to follow. Feel free to comment or send me photos of your bracelets. If you need instructions on how to recite the rosary, click here.


Thursday, March 6, 2008

Memories of That Good Old Bag

Many years ago, when I was still single and working full-time, a close friend of mine and I were totally hooked on patchwork leather bags. We loved one brand in particular, 'Garahe', which means 'garage' in English. At the end of each year, the factory making these bags held a massive one day sale. The best thing was that the factory was actually just a block away from our house. As customers were entertained on a first-come, first served basis, my friend would sleepover at our place the night before and we would be up and about early the next day and would be standing in line outside the factory at 6:00 in the morning! After all, the early bird did get the most bags and the best choices! We would hoard everything we liked and then decide at the checkout which ones we will purchase (based on our budget).

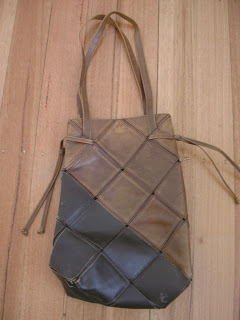
My friend and I had a common favourite bag (pictured on the right) - a very roomy one, which literally fit everything we needed and brought to and from work, including our office blazers and even some extra footwear. I still have that bag - it's probably nearly 20 years old by now. I haven't been using it for a long time as it is already tattered in places and the magnetic snap is wrecked. When I left the Philippines in 2001, I had to give away most of my Garahe bags, but this one I just had to keep...for sentimental reasons. It constantly reminds me of a friend I dearly miss and of the great times we had together.

That friend of mine recently visited Australia (just in time for my birthday!). From the looks of it, I reckon she is still very much a bag person up to now. I am contemplating on making her a fabric patchwork ba
g patterned from our favourite bag. But as I am not yet that good at sewing, I know I need tons of practice first before attempting to embark on such an ambitious project.

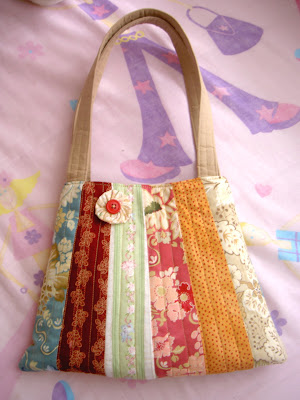
For starters, I made this patchwork bag yesterday. I believe the pattern is Japanese in origin. The size is just right for my needs. Sewing the patchwork pieces together and then quilting it wasn't as hard as I thought it was going to be, but assembling the bag was quite a pain. I actually broke 2 needles. The stitches are still not so perfect and I find the handles a bit too stiff, but I simply adore it. I even managed to embellish it with a flower yoyo!

I guess I'm on my way to making that bag for my mate.